Related FAQ
👥 Group discussion
You can create, join or leave a group and its discussion in which messages are received by all its participants.
Create a group and its discussion
iPhone iPad
-
Tap
 (bottom).
 -
Tap
 Create Group.
 -
Select the members you want to add to this group to allow them to participate in its discussion.
-
Specify or not the details of the group. You can always change them later.
-
Tap
 Create group, then confirm.
Congratulations! You are now the administrator of this group and its discussion, which was automatically created. It appears in your discussions list ![]() .
.
Android
-
Tap
 (bottom).
 -
Tap
 NEW GROUP.
 -
Select the members you want to add to this group to allow them to participate in its discussion.
-
Specify the group’s details and choose its type. You can always modify them later.
- Simple: All members are administrators and can invite new members.
- Private: Only you can invite new members to this group.
- Read-only: Only group administrators are authorized to post messages.
- Custom: Choose the discussion settings that suit you best (administrators, read-only, etc.).
-
Tap CREATE GROUP.
Congratulations! You are now administrator of this group and its discussion, which was automatically created. It appears in your discussions list ![]() .
.
Depending on the type of group created, any participant can send and receive messages that will be received by all the others.
Each group member can view the details of a group and its discussion along with the list of members and participants in the discussion.
Clone a group
You can clone any group. This will copy the title, photo and, of course, members into a new, blank discussion for which you will be the main administrator.
iPhone iPad
-
Tap
 Clone this group.
Android
-
Tap
 , then Clone this group.
View all your groups and their discussions
To view a list of all your groups and their discussions,
iPhone iPad
- Tap (bottom).
-
The groups you administer are displayed first.
-
The groups you have joined are shown next.
Android
- Tap (bottom).
- The groups you administer are displayed with a
 crown on the discussion icon.
View the details of a group and its discussion
The details of a group and its discussion display its invited members and the participants who have joined it, as well as its administrators and your options. You can view them in two ways:
-
Display the group discussion and tap its title (top).
-
View all your groups and their discussions, then tap the name of the group and its discussion.
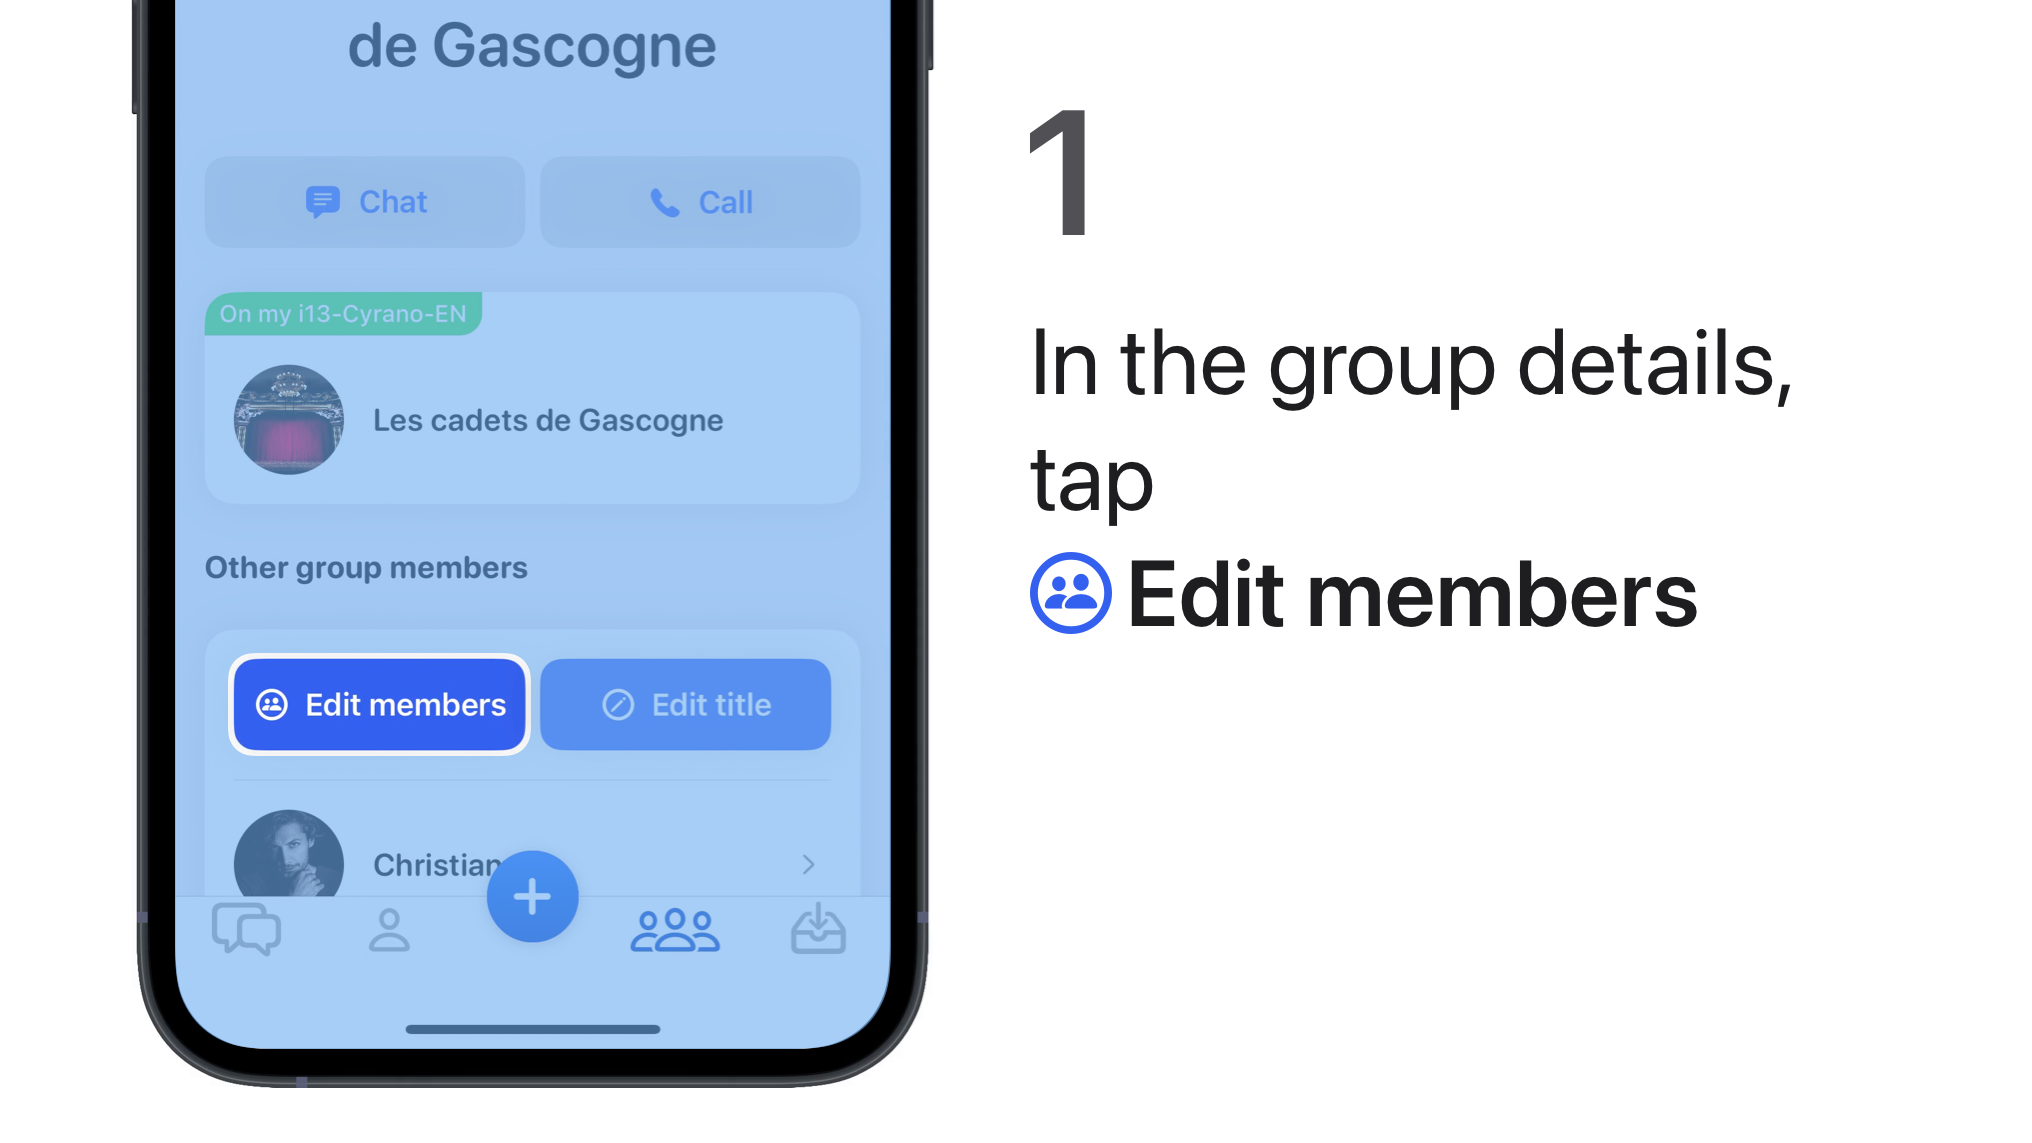
Modify the details and type of a group and its discussion
If you are the administrator of a group and its discussion, you can modify its details and type.
iPhone iPad
-
Tap
 Edit Members or
  Edit Title or
  at top right.
Android
-
Tap
 .
.The Edit group details screen appears.
-
Select your choices, then press PUBLISH.
Join a group and its discussion
To join a group and its discussion, one of its administrators must add you to the members invited to participate.
Leave a group and its discussion
You cannot leave a group and its discussion if you are the only administrator. Otherwise, any member or participant can leave a group and its discussion.
-
Tap
 Quit the group, then tap OK to confirm.
Add participants
If you are the administrator of a group and its discussion, you can add participants.
-
Tap
Edit Members, then Add group members. -
Select the participants you want to add, then tap OK.
-
Tap
 Publish to confirm, or Cancel to leave it as is.
If you cannot find the person you are looking for, ask him/her to update Olvid.
Remove participants
If you are the administrator of a group and its discussion, you can remove participants.
-
Tap
Edit Members.The list of group members and participants in this discussion is displayed.
-
Tap
 to the left of the name of each participant you want to delete.
 -
Tap
Publish to confirm, or Cancel to make no changes.
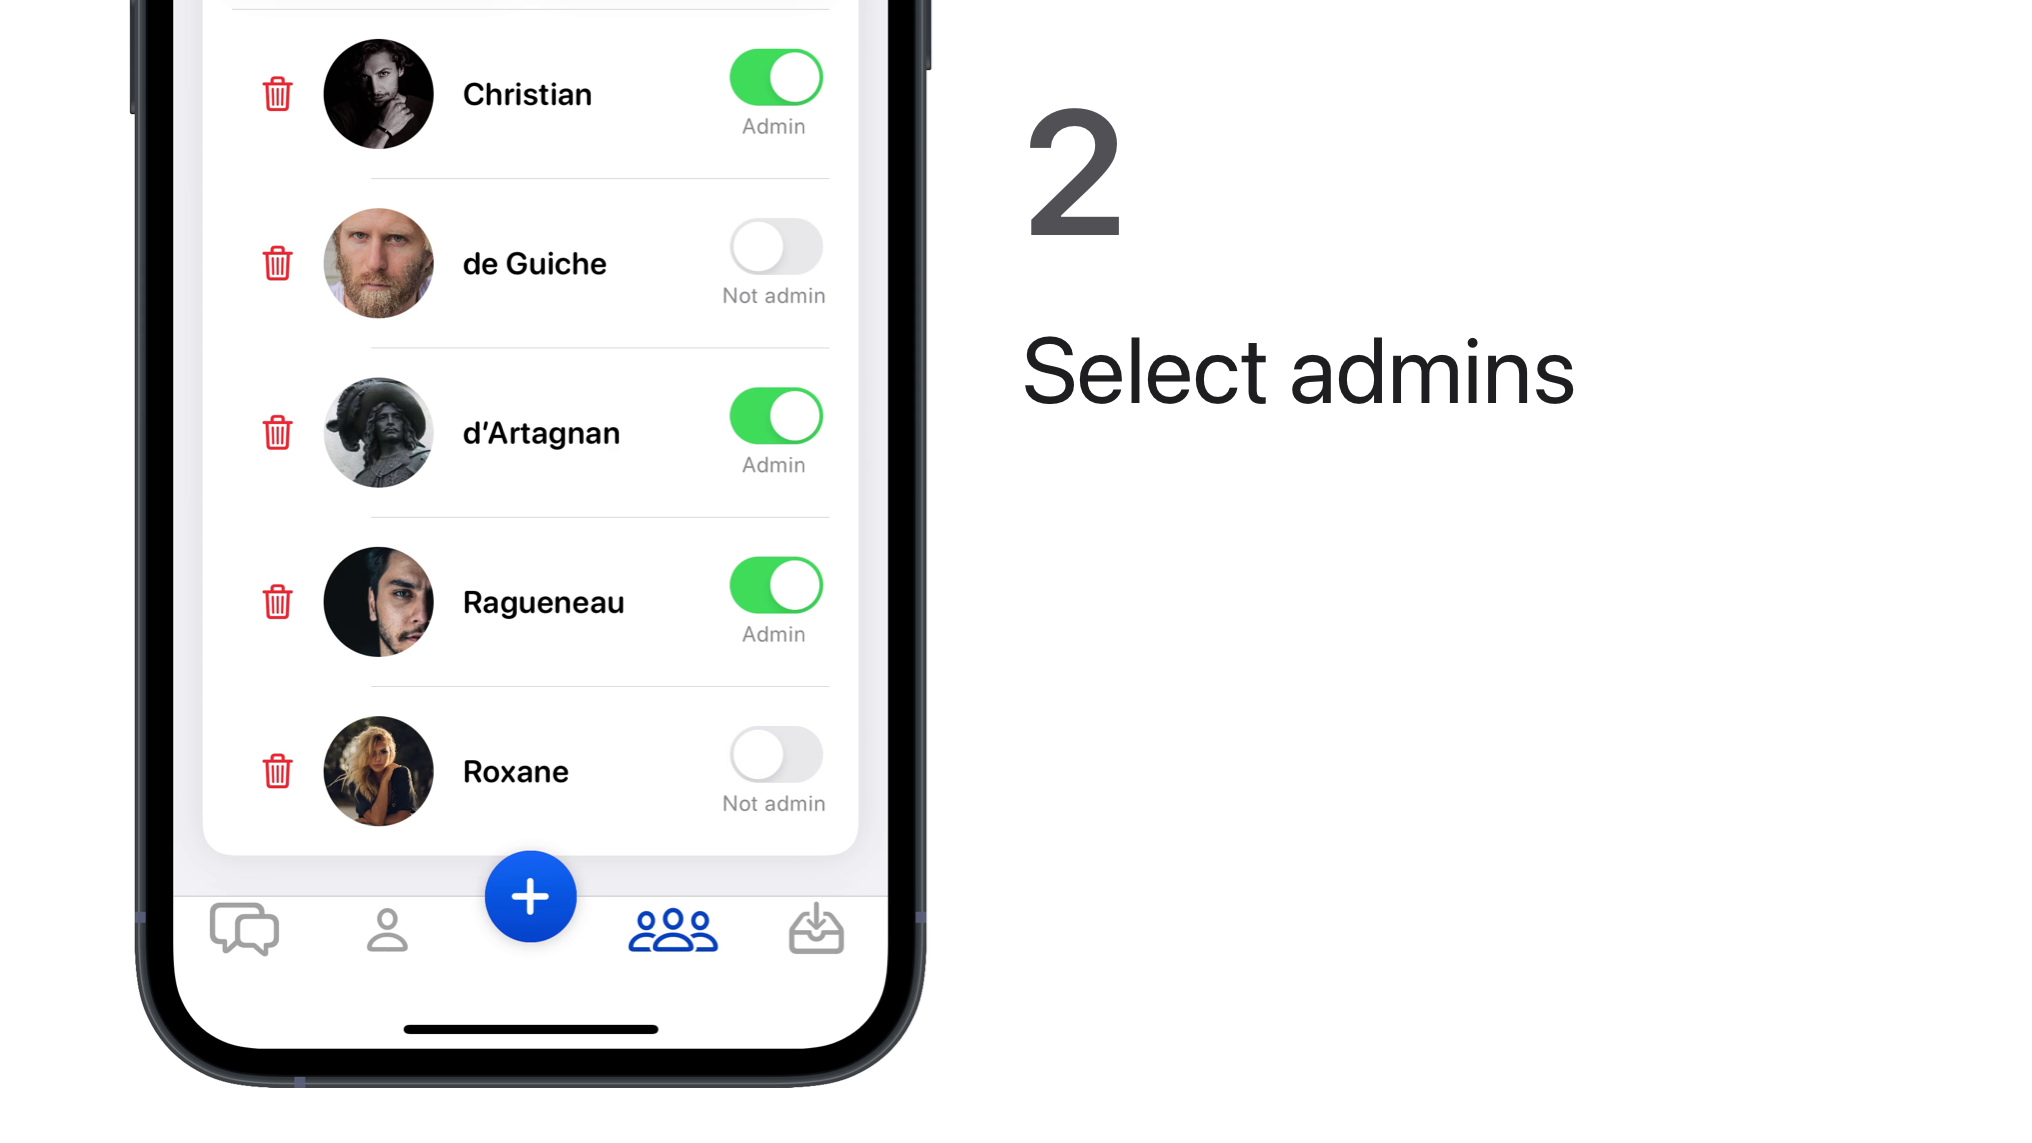
Add or remove administrators
If you are the administrator of a group and its discussion, you can grant or remove the right to administer it to other participants. They can then add or remove participants and other administrators.

-
Tap
Edit Members.The list of group members and participants in this discussion is displayed.
-
Enable to the right of the name of each participant you wish to grant the right to administer the group, or to remove it.
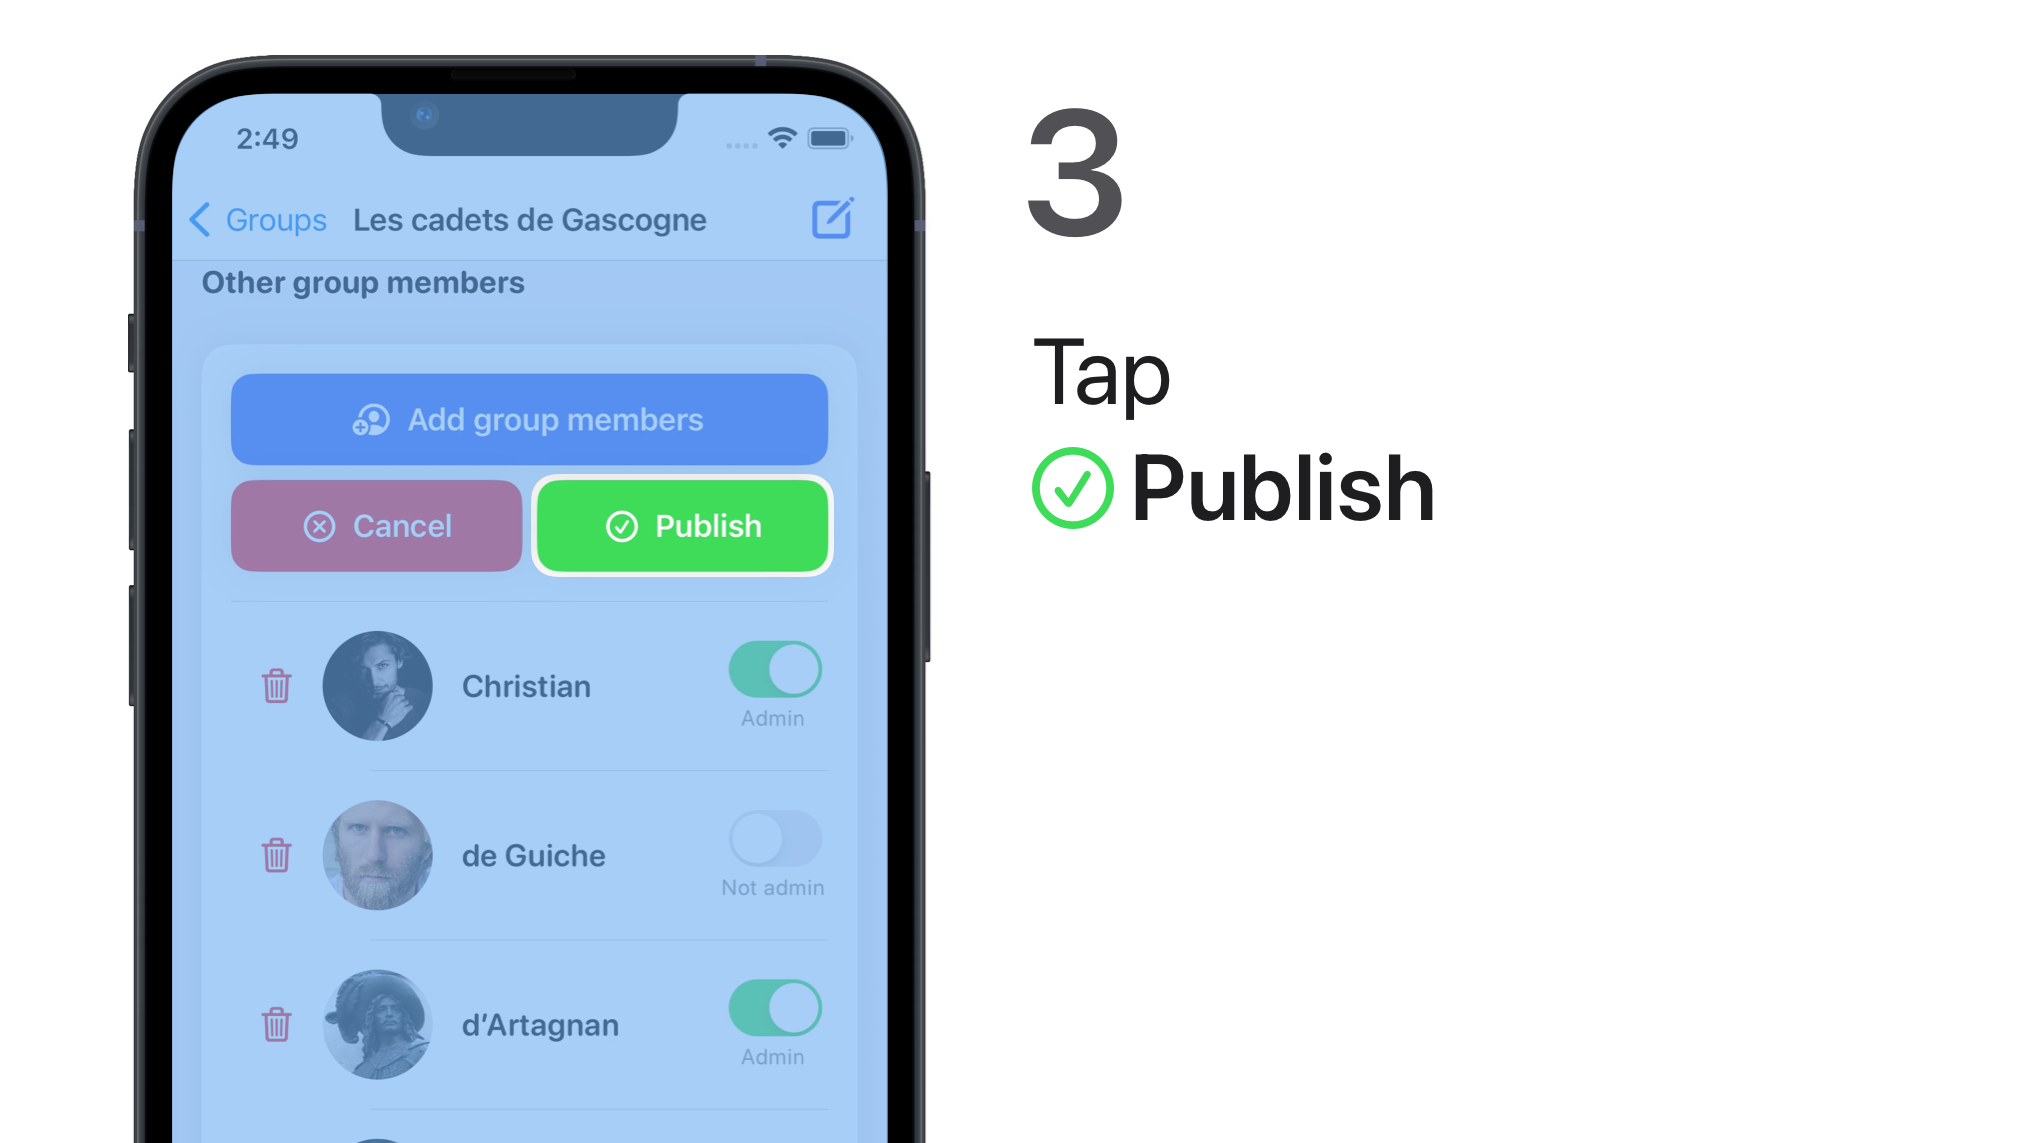
-
Tap
Publish to confirm, or Cancel to make no changes.
Start a private discussion with a group participant
You can start a private discussion with a group participant as soon as he/she is in your contacts. If they are not yet in your contacts, you can invite them. Here is how to add other users to your contacts.
Delete a group
If you are the administrator of a group and its discussion, you can delete a group and any possibility to write in its discussion. The discussion of the group will be blocked and nobody will be able to write in it anymore.
Be careful, this operation is irreversible and the group will be deleted from all participants.
To delete a group,
-
Tap Disband this group.
A warning and confirmation message will be displayed.
-
Tap Delete this group for all members or
Cancel.The group automatically disappears from your list of groups and the group discussion is blocked in all users with the automatic message “You are no longer part of this group, because you have left it, because an administrator has removed you from the group, or simply because the group has been deleted 🥲.”
Then you can also delete the discussion and all its posts.