Table of Contents
- Base Installation
- Prerequisites
- Installation of Keycloak
- Running Keycloak in a Container
- Using nginx and certbot
- Configuration of Keycloak
- Configuration of the Olvid Plugin
- Upgrading
- Additional Configuration
- Configuration of an External IdP
- Using LDAP User Federation
- x509 Client Certificates Authentication
- Configure Olvid via an MDM
- Using the management console
- Use the Olvid Management Console
- Misc.
- Changelog
Installation of Keycloak
The official Keycloak Server Administration Guide can be found here:
Please refer to it whenever you believe your configuration might differ from the standard configuration we describe here.
-
If you intend to run Keycloak natively on your server, please read on.
-
If you would rather run Keycloak in a container, please read the Running Keycloak in a Container page.
1. Download the Keycloak + Olvid bundle
The Olvid Plugin is bundled with a complete Keycloak distribution.
-
From your linux server, download the latest bundle from:
https://static.olvid.io/keycloak/keycloak_olvid_26.6.4_4.6.3.tar.gz -
Check that the SHA-256 hash of the bundle is:
91ac152ac36ec0b4911a7c859d0bafa1f2f399714324c77c3fac71a66a4ba79e -
Uncompress the archive to obtain a
keycloak_olvid_26.6.4_4.6.3folder.
All the following steps are executed from within this folder.
> wget https://static.olvid.io/keycloak/keycloak_olvid_26.6.4_4.6.3.tar.gz
> sha256sum keycloak_olvid_26.6.4_4.6.3.tar.gz
> tar xvf keycloak_olvid_26.6.4_4.6.3.tar.gz
2. Modify the configuration file
The Keycloak configuration file can be found in:
keycloak_olvid_26.6.4_4.6.3/conf/keycloak.conf
- Open it in your favorite text editor to configure the database connection (the parts in red below). You do not need to configure the other options from this file, they are already properly set in the bundled startup script (through command line options).
# Basic settings for running in production. Change accordingly before deploying the server.

# Database

# The database vendor.
db=postgres

# The username of the database user.
db-username=keycloak

# The password of the database user.
db-password=password

# The full database JDBC URL. If not provided, a default URL is set based on the selected database vendor.
db-url=jdbc:postgresql://postgres.local.ip/keycloak

[...]
For the db field, the value should be the vendor of the database system (see the official documentation):
postgresfor PostgreSQLmysqlfor MySQLmariadbfor MariaDBmssqlfor Microsoft SQL Server
Additional options can be set in the conf/keycloak.conf configuration file, the conf/quarkus.properties file or in the command line of the 1.olvid_scripts/run_keycloak.sh startup script, but for now there is no need to change them. We will come back to this later.
3. Start Keycloak
-
Now that Keycloak is configured, you may start the server. The first launch will be used to create the first Keycloak admin credentials. The
keycloak_olvid_26.6.4_4.6.3/1.olvid_scripts/folder contains a special script for this. Provide the adminusernameandpasswordof your choice:> keycloak_olvid_26.6.4_4.6.3/1.olvid_scripts/first-launch-keycloak.sh -u<username> -p<password> -
Check the standard output logs for errors. If everything goes well, connect to the internal IP/localhost on port
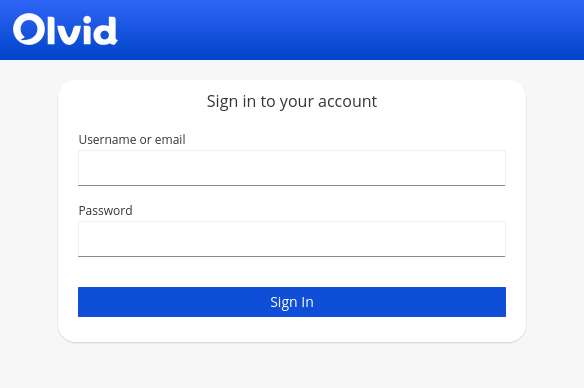
8080. You should be redirected to the Keycloak authentication page (customized with an Olvid logo).The connection URL should look something like this
http://10.1.2.3:8080/auth/. Once we set up the reverse proxy we can add a redirection, but for now the URL must end with/auth/.
4. Check connectivity with the Olvid distribution server
You can check if your Keycloak server can reach the API point it needs to query on the Olvid server using either curl or wget with one of the following commands:
> curl -X POST https://server.olvid.io/keycloakQuery
> wget -q --post-data="" https://server.olvid.io/keycloakQuery -O -
If you get the output Connection successful, everything is fine 😀
4.1 Configuring an outgoing proxy
If your server needs to go through an HTTP proxy for outgoing connections, this is possible! The official documentation explains different solutions for this, but the one we found to be the simplest is the use of a proxy mapping in the Keycloak startup command line.
#!/bin/sh
`dirname $0`/../bin/kc.sh \
--config-file=`dirname $0`/../conf/keycloak.conf \
start \
--proxy-headers xforwarded \
--hostname-strict=false \
--http-enabled=true \
--http-relative-path=/auth \
--log=console,file \
--log-level=INFO \
--spi-connections-http-client-default-proxy-mappings='server\\\.olvid\\\.io;http://proxy.local.ip:3128 '
This adds the proxy only for connections to server.olvid.io. If you want to use the proxy for any outgoing keycloak connection, you can use a wildcard with something like --spi-connections-http-client-default-proxy-mappings='.*;http://proxy.local.ip:3128'.
5. Create a startup service to autostart Keycloak
In order for Keycloak to automatically start with your server, you may create a startup script and add it to the default services. If your server uses systemd (this is the case for Ubuntu or CentOS), you can copy the sample 1.olvid_scripts/keycloak.service file to /etc/systemd/system/keycloak.service. This file contains the following lines (replace the part in red with the actual path to the keycloak_olvid folder if needed):
[Unit]
Description=Keycloak
After=syslog.target network.target
Before=httpd.service
StartLimitIntervalSec=600
StartLimitBurst=15
[Service]
User=root
Group=root
LimitNOFILE=102642
PIDFile=/var/run/keycloak/keycloak.pid
ExecStart=/opt/keycloak_olvid_26.6.4_4.6.3 /1.olvid_scripts/run-keycloak.sh
StandardOutput=syslog
StandardError=syslog
SyslogIdentifier=keycloak
Restart=on-failure
RestartSec=20
[Install]
WantedBy=multi-user.target
You may then start the service and add it to the default startup service with:
> systemctl start keycloak
> systemctl enable keycloak
Contrary to the manual startup where the logs go to the standard output, when starting this way, the Keycloak logs are both sent to syslog and written in the file data/log/keycloak.log inside the keycloak_olvid folder.
Note that the provided startup script instructs systemd to automatically restart the service on failure. There is a limit of 15 restarts in 10 minutes, and once this limit is reached, you may have to wait before you can manually restart the service. This limit could, for example, be reached if the database is offline for a prolonged time during a server restart.
6. Configure a reverse proxy
The Keycloak server is configured to run behind a reverse proxy taking care of SSL/TLS and redirecting connections on the public DNS of Keycloak towards the keycloak server, on port 8080. We recommend always using a reverse proxy for this rather than configuring Keycloak to handle SSL/TLS itself.
If you only need Olvid users to authenticate through this reverse proxy (and can access the Management Console through a local address), you will need to forward the paths:
/auth/resources//auth/js//auth/realms/olvid/(the final/olvid/may change if you decide to use another name for your Olvid users realm)
If you wish to access the Olvid Management Console from an external IP, you should also forward the paths:
/auth/realms/master/olvid-rest/authenticationDiscovery/olvid/auth/olvid//auth/realms/olvid_admin/(the final/olvid_admin/may change if you decide to use another name for your Olvid admin realm)
Please have a look at the example nginx configuration file to see how this can be done.
Also, the reverse proxy must send some required headers for Keycloak to properly work:
X-Forwarded-ForX-Forwarded-ProtoX-Forwarded-Host
And some buffer sizes might need to be adjusted (the default nginx buffers are too small).
To be able to access Keycloak and the Olvid management console through simple URLs, we recommend adding some simple redirects:
/redirects to/auth/olvidredirects to/auth/olvid/
If you do not already have a reverse proxy in place you may run nginx directly on the Keycloak server. This will also require you to have the SSL certificate for your server. The steps to install certbot (to get a Let’s Encrypt certificate) and nginx on an Ubuntu server can be found in using nginx and certbot.
You can now continue with the Configuration of Keycloak