Table of Contents
- Base Installation
- Prerequisites
- Installation of Keycloak
- Configuration of Keycloak
- The Master realm
- The Olvid users realm
- The Olvid admin realm
- Configuration of the Olvid Plugin
- Upgrading
- Additional Configuration
- Configuration of an External IdP
- Using LDAP User Federation
- x509 Client Certificates Authentication
- Configure Olvid via an MDM
- Using the management console
- Use the Olvid Management Console
- Misc.
- Changelog
Configure the Master realm
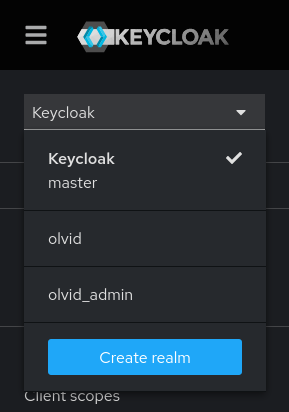
Most Keycloak configurations are realm-specific. Before modifying any configuration, make sure the correct realm is selected at the top left of the console. For now, we want to configure the master realm which is shown as “Keycloak” there. Previous versions of Keycloak offered a dropdown menu to select the current realm, this was replaced by a dedicated Manage realms page.
1. Themes
Previous versions of the Keycloak Olvid Plugin included a theme selector which could modify the default theme. This is no longer the case, and the Olvid theme must be manually selected.
-
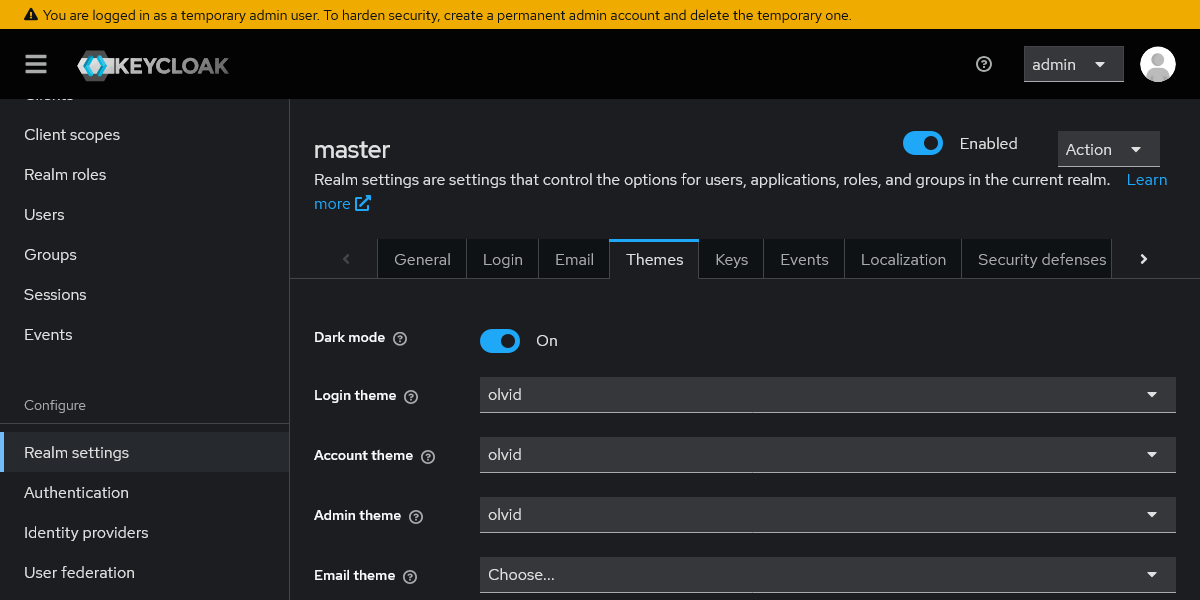
Open the Realm settings page from the left menu and select the Themes tab.
-
Select olvid for the Login theme, the Account theme, and the Admin theme, and press Save at the bottom.
-
Reload the page, it should now show a blue banner at the top to access the Olvid Management Console.

-
Click the top bar. It should open a new tab showing the Olvid Management Console. Close this tab for now to go back to the Keycloak admin console.

2. Security settings
Out of the box, Keycloak does not enforce many security mechanisms regarding authentication, so we may want to enable some of them. The settings we enable here can also be enabled for the other realms we will configure afterwards.
Brute force detection
First go to Realm settings in the left menu, select the Security defenses tab at the top and the Brute force detection sub-tab.
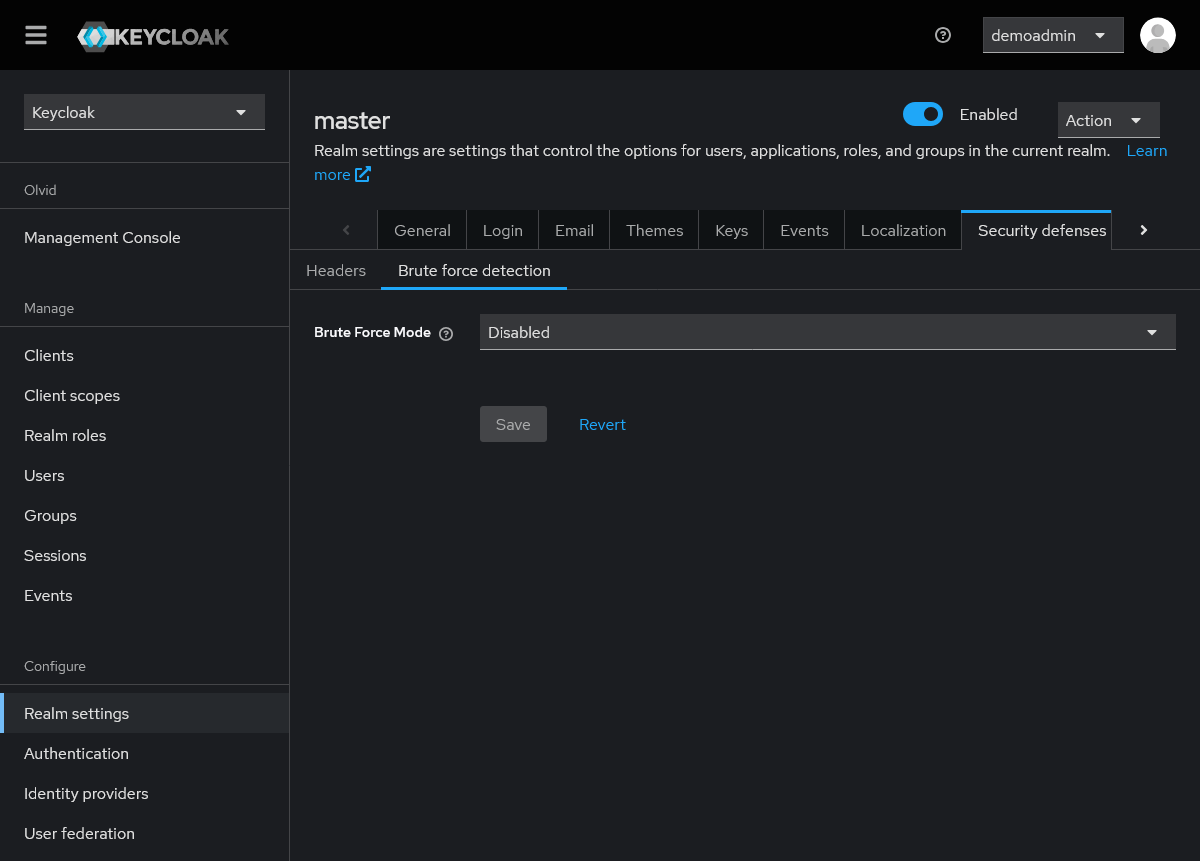
Brute force detection is Disabled by default. Keycloak offers different lockout presets, we recommend setting it to Lockout temporarily and adjusting the Max login failures and Failure reset time to your needs, but stricter policies are perfectly acceptable 😁.
If you ever get locked out of the master realm because all user accounts are in permanent lockout, you always have the possibility to recreate a temporary admin account using the first-launch-keycloak.sh script as during the installation phase. More details can be found in the official documentation.
2-factor authentication
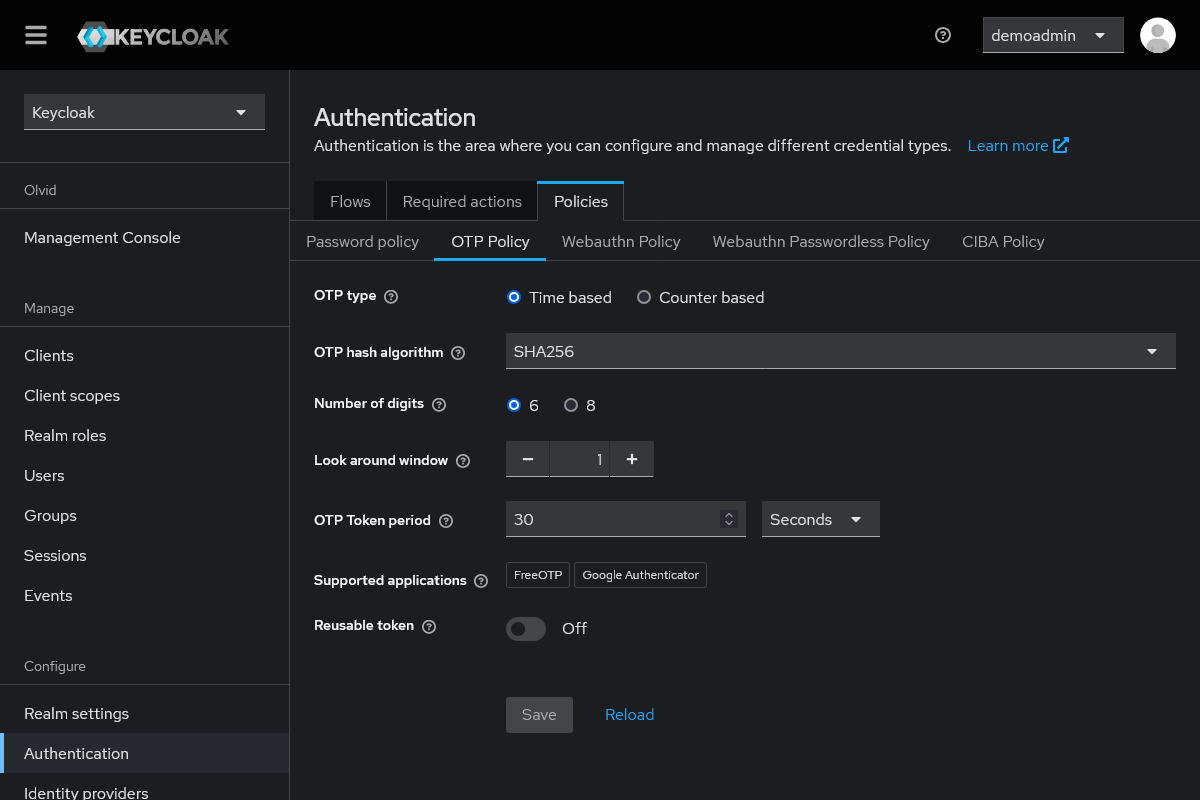
Keycloak supports 2-factor authentication using authenticator app OTP out of the box. Parameters for the OTP can be configured on the Authentication page, in the Policies tab and OTP Policy sub-tab.
-
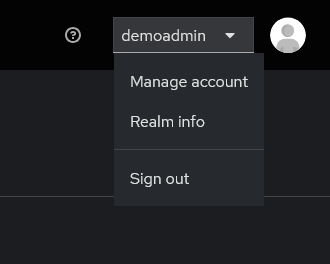
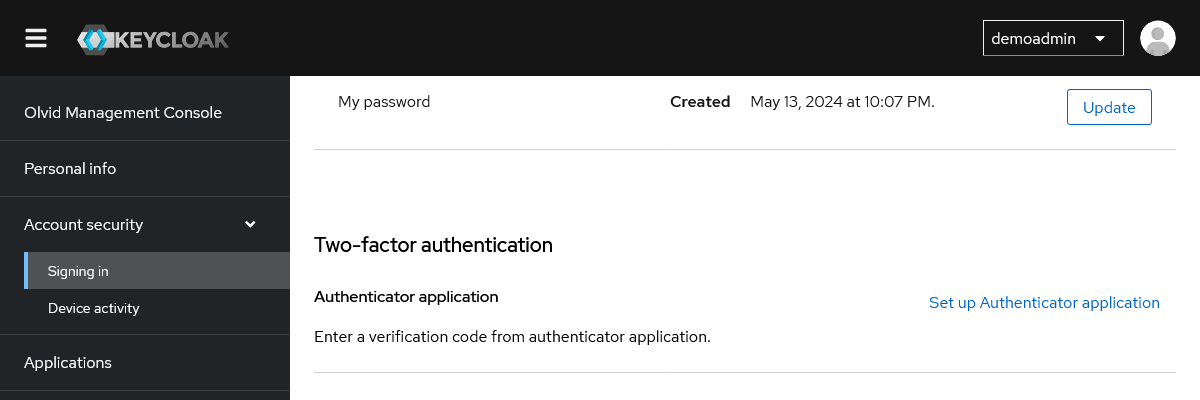
Each user may choose to enable 2-factor authentication for their account by selecting Manage account for the top right dropdown and opening the Account security and Signing in page from the account page left menu.
They may now click Set up Authenticator application to enroll their authenticator app.
-
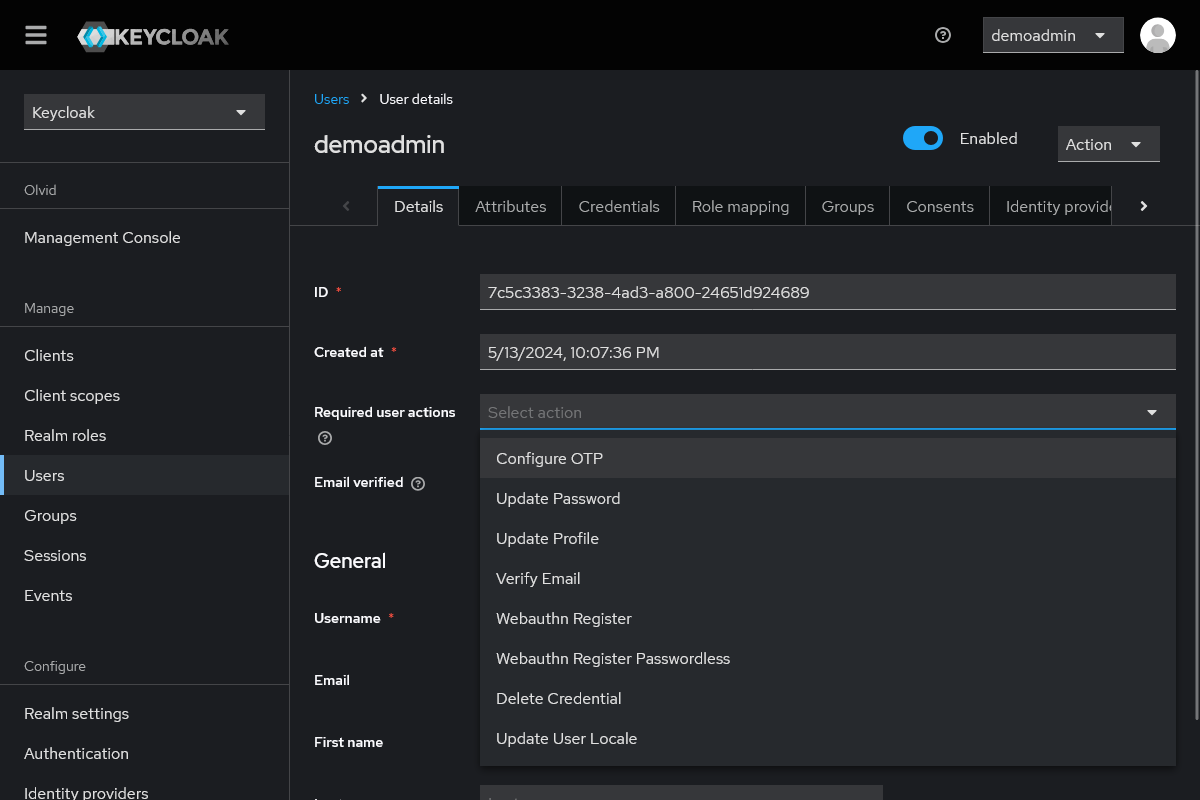
An admin may force a user to enroll an authenticator app by selecting the Users page from the left menu, finding the user they want and from their Details page, adding the Configure OTP “Required user actions”.
-
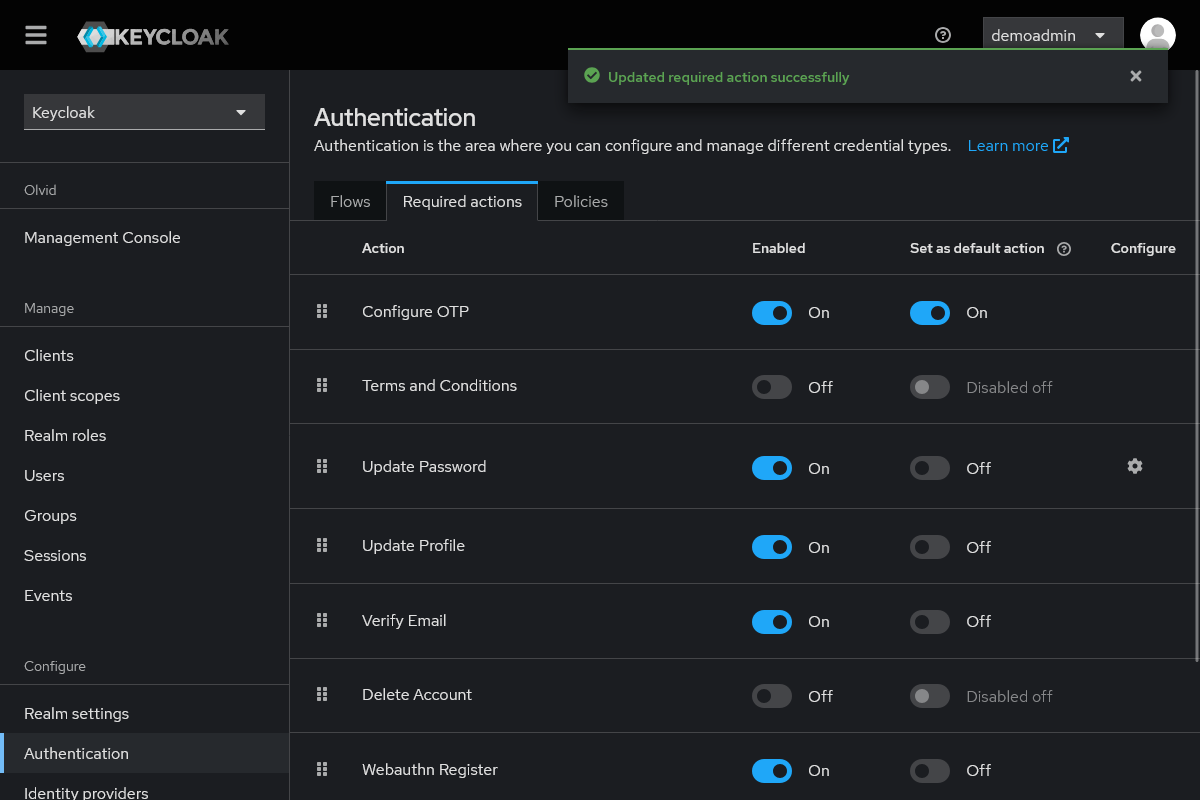
Finally, you may force any new user in a realm to “Configure OTP” by opening the Authentication page, opening the Required actions tab and turning the “Set as default action” switch On for Configure OTP
Password policy
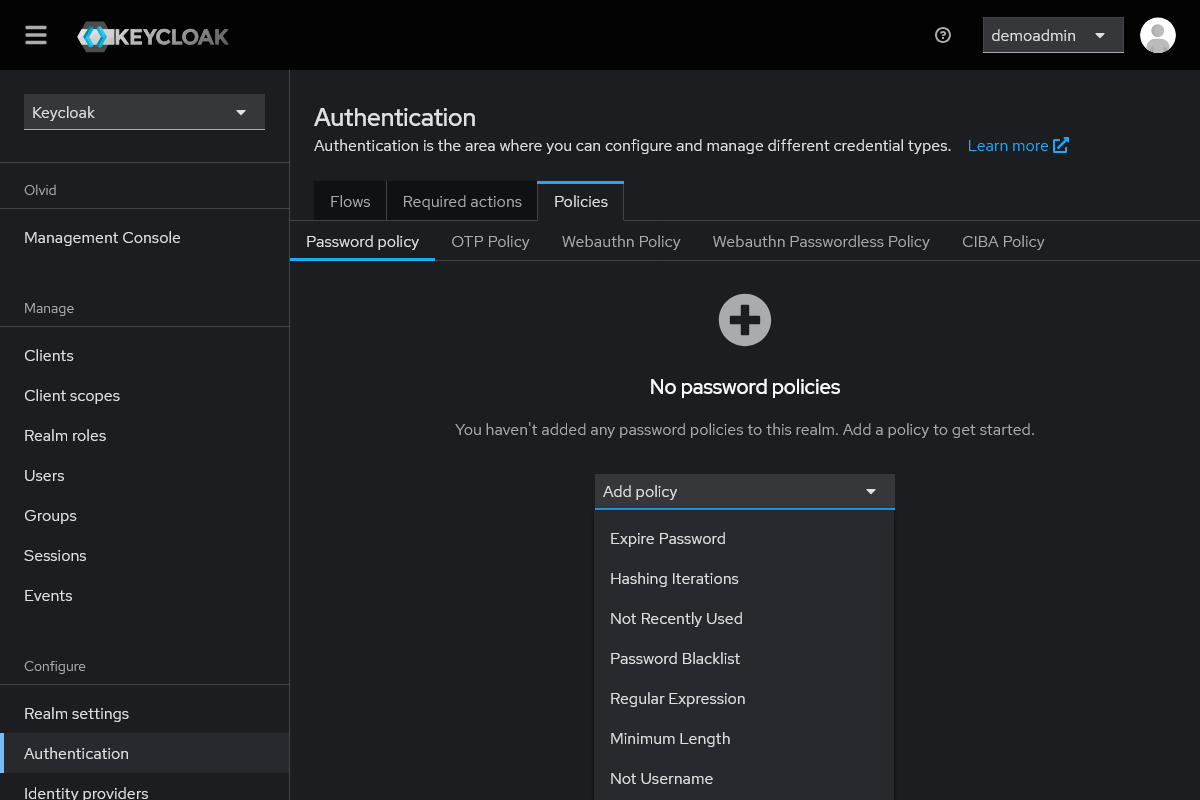
You may also define password policies to enforce a minimal length or special characters in realm user passwords. You may configure this on the Authentication page, in the Policies tab and Password policy sub-tab.
HTTP security headers
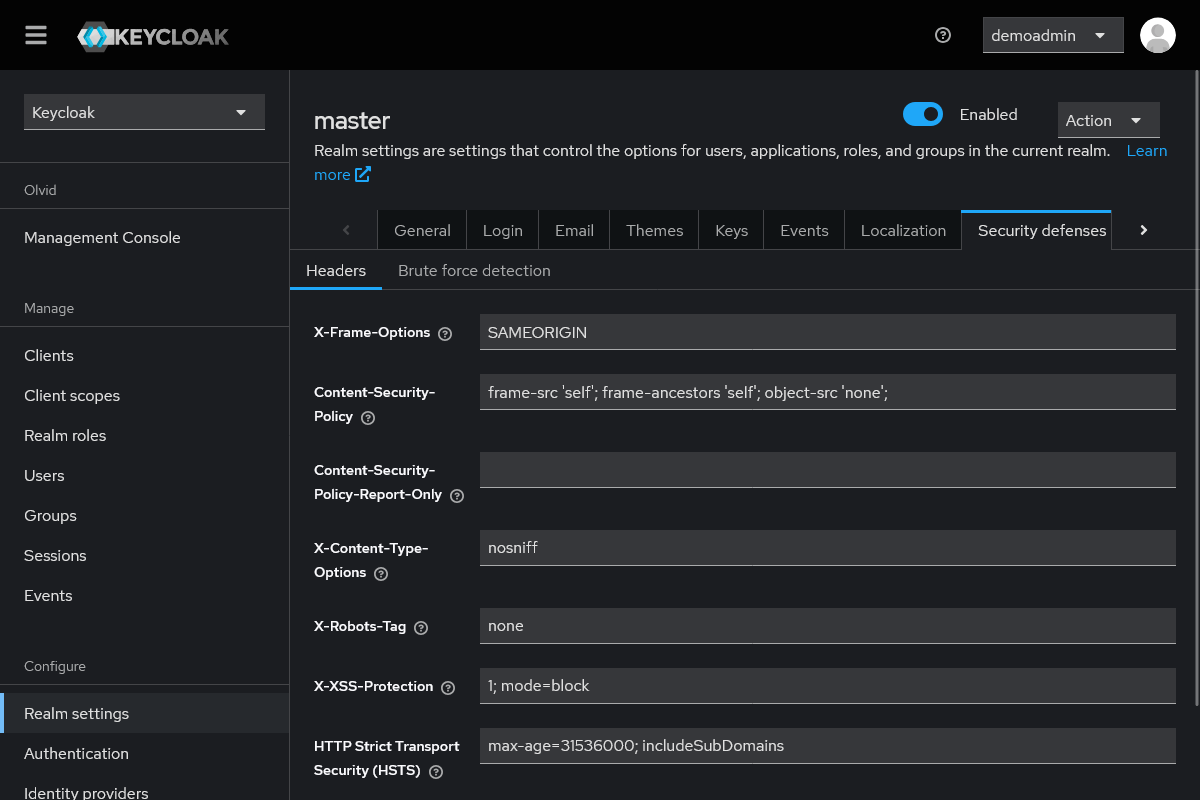
By default, Keycloak defines a few HTTP security headers. You may want to change the default settings to match your organisation’s security policy. This can be done on the Realm settings page, in the Security defenses tab and the Headers sub-tab.
⚠️ Setting too restrictive security headers may break the Keycloak authentication flow!
- Before modifying these headers, please consider taking a snapshot of the Keycloak database to easily roll back any change. You may also test authenticating with the console from a private window after making changes and before logging out of Keycloak.
- If you somehow end up locked out of Keycloak, you always have the possibility to:
- modify these headers using the
kcadm.shscript and changing themasterrealm configuration, - connect to the Keycloak database and make changes there.
More details can be found in the official documentation.
- modify these headers using the
The headers you configure here apply to pages served in the context of a specific realm and should be repeated for all realms. Also, some pages are served as static files, directly by Quarkus (the engine on which Keycloak is built). The settings configured here do not apply to these files. This is for example the case for the Olvid Management Console. Security headers can be configured for these pages by modifying the conf/quarkus.properties file inside your Keycloak installation folder. Keycloak needs to be restarted before changes you make to this file are taken into account.
3. Create a permanent Keycloak admins
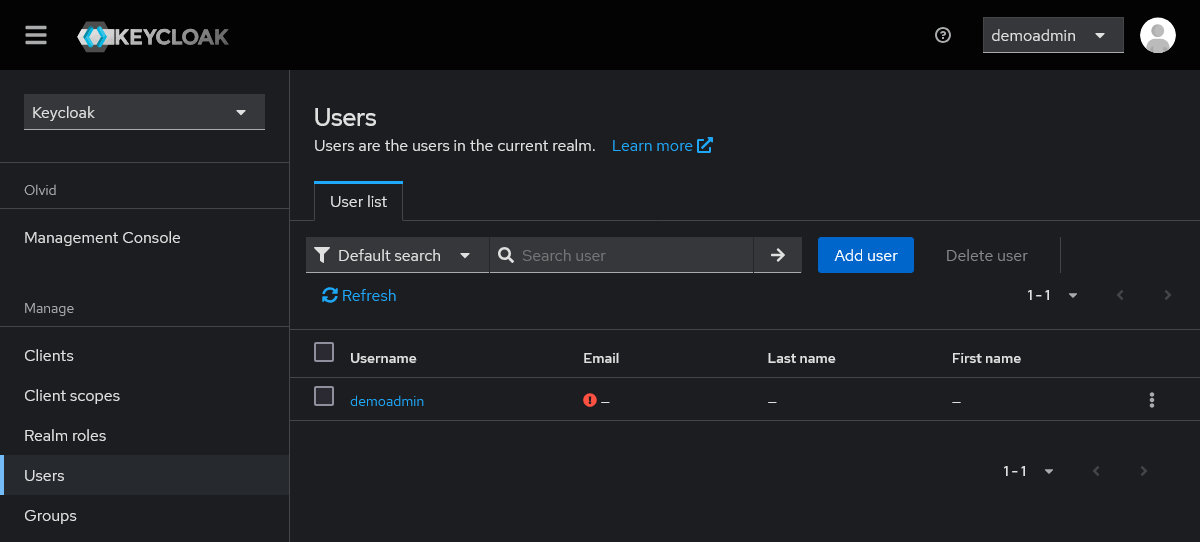
For now we have only created one “temporary” admin user in the master realm. You should replace it by a permanent admin account, and may also add other admins:
-
open the Users page in the left menu and press Add user
-
enter a Username and any other field you want to add
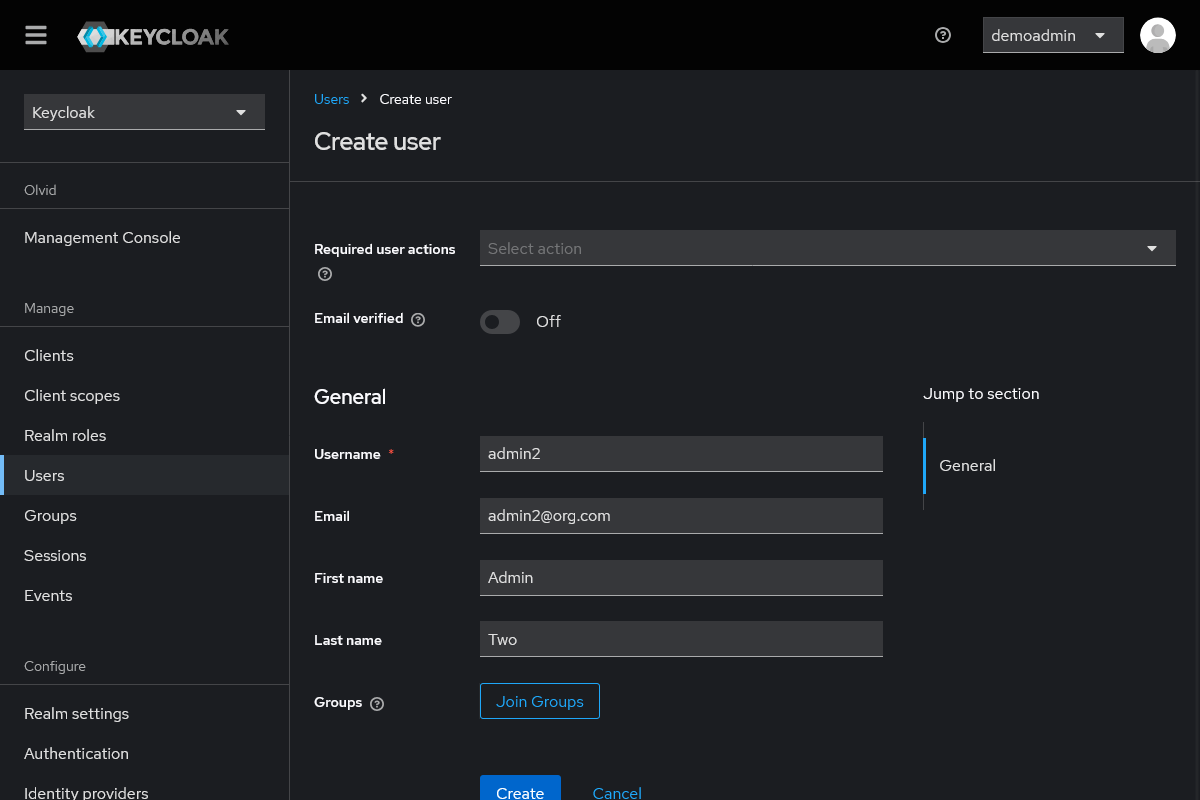
- The Email verified switch allows telling Keycloak that email verification is not required for this user
-
The Required user actions dropdown at the top allows to define actions the new user will need to take after he first signs in. Not need to set Update password yet as it will be set by default when creating a password for this user.
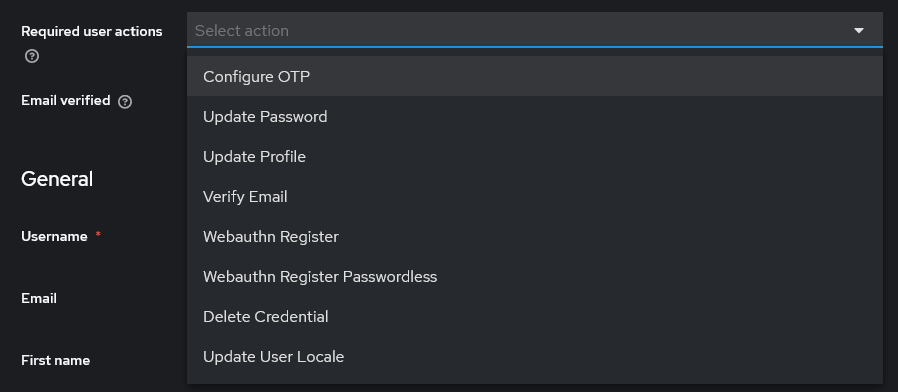
-
now press Create to create the user and go to the Credentials tab to set a password.
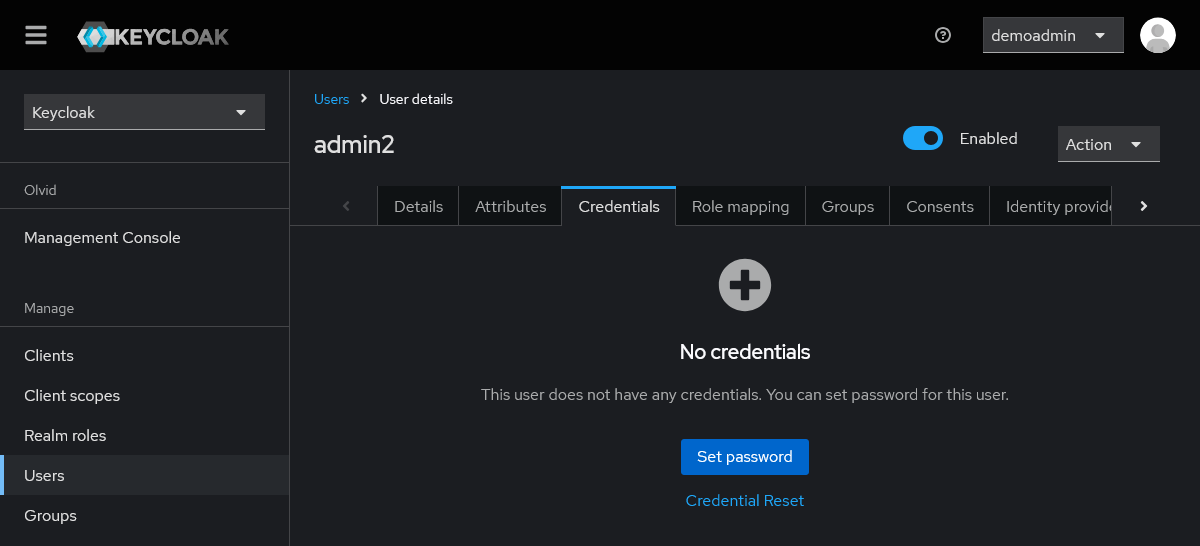
-
press Set password and enter the temporary password for the new user. Leaving the Temporary switch on will require the user to change this password when they first sign in.
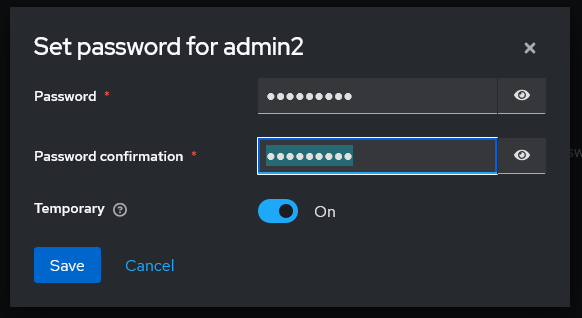
-
open the Role mapping tab and press Assign role button
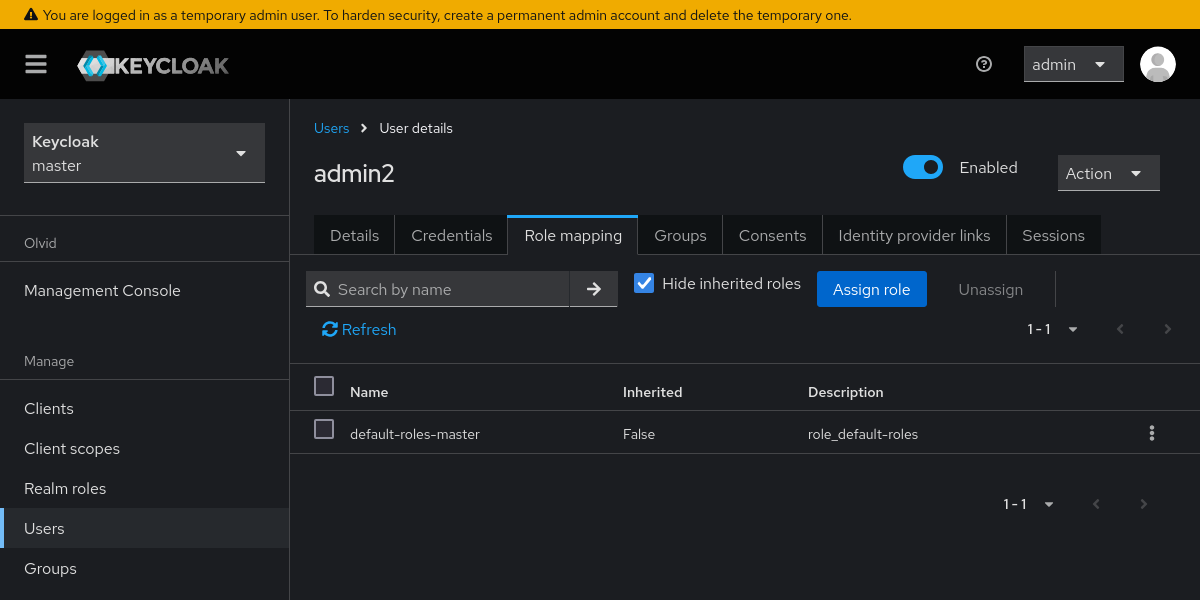
-
press the Filter by clients dropdown and select “Filter by realm roles”.
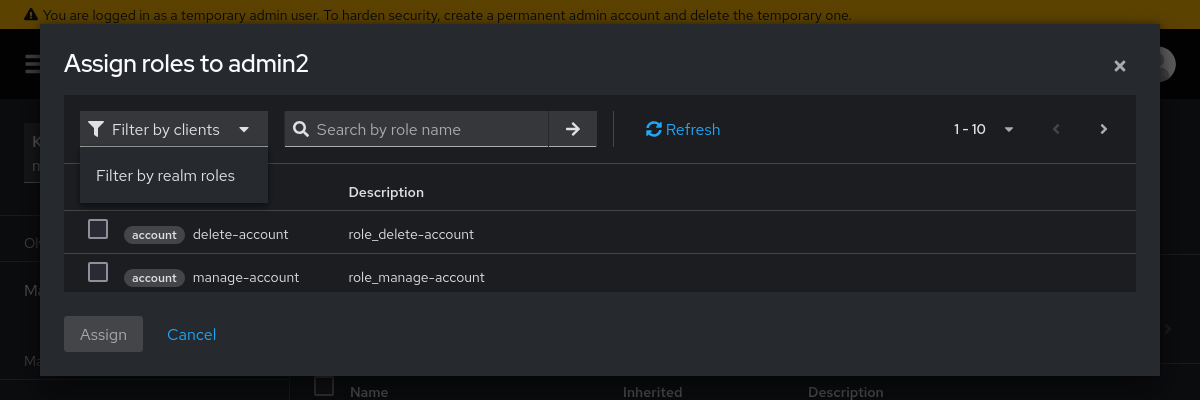
-
check the admin checkbox and confirm with the Assign button
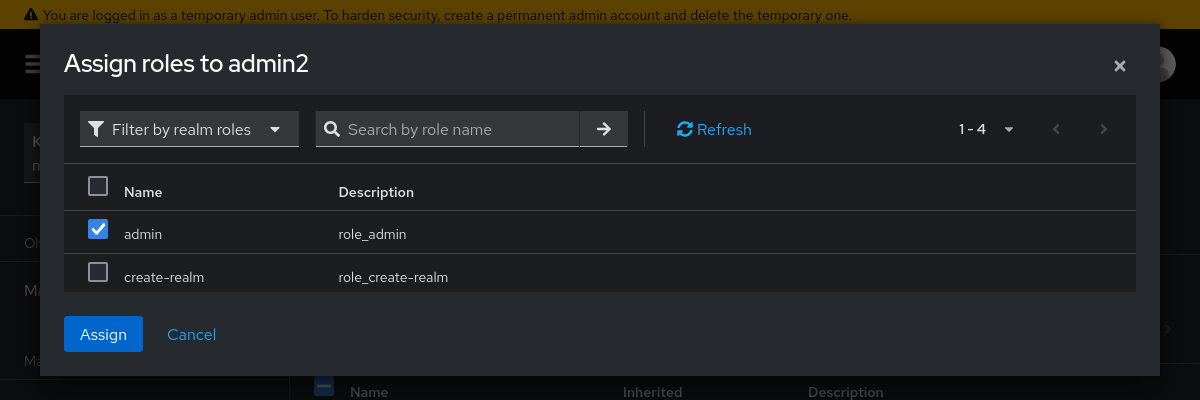
Once a permanent admin account is created, you may sign out from the temporary account and sign back in with the permanent account (changing the temporary password if requested).
If you see an error page like this:

This probably means the admin role was not properly set for this account. Sign back in as the temporary account and check the permanent admin roles.
4. Sending E-mails (optional)
When creating users and admin users from the Olvid Management Console it is possible to have them receive their temporary password by email. To do so, Keycloak must be configured to send emails. Note that the master realm’s email configuration will be used for all emails sent through the Olvid Management Console.
-
Open the Realm settings page from the left menu and select the Email tab.

-
Fill in the required configuration information, including appropriate credentials if authentication is required.
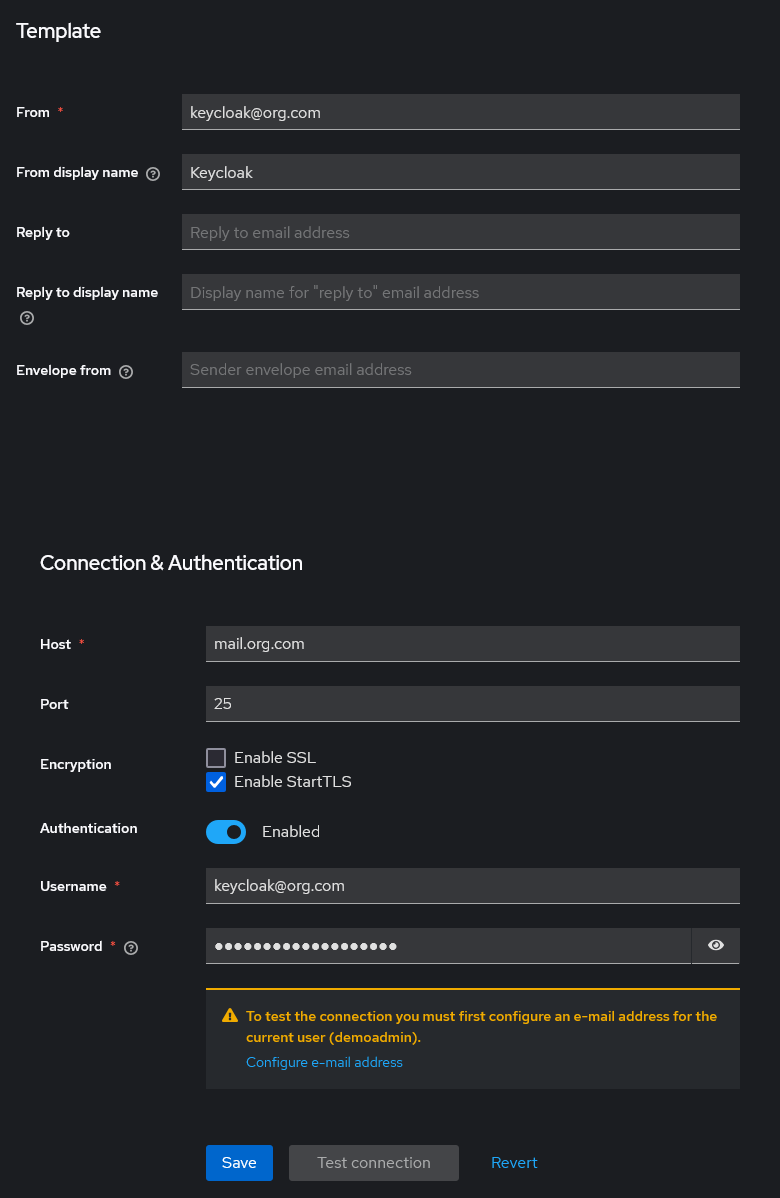
If you get the same warning as on the screenshot above, you simply need to configure an email address for the user you are currently logger in as.
- You may press Test connection to validate that Keycloak can indeed connect to the SMTP server.
- When everything is ready, do not forget to press Save.